Ninety days is enough time to plan a calm, well-organised wedding when each week has a defined job. The couples who arrive at their wedding day feeling composed are not the ones who started with the most time. They are the ones who started with a clear structure and followed it consistently, booking the right things in the right order and keeping every supplier informed at the right moments.
This countdown is designed for UK couples, including those planning multi-event South Asian weddings across a Mehndi, Nikah, and Walima. It covers budget, venue, catering, photography, clothing lead times, personalised items, and the final logistics that determine whether the last week before your wedding feels like maintenance or a crisis.
Set Your Foundation Before the Countdown Begins
Before you start working through the week-by-week plan, invest one focused session in building the foundation everything else will rest on. List every event you plan to host, from the largest to the smallest. For each one, write a single clear line that states its purpose, approximate guest count, and food approach. Note the date windows that work for your family and for the venue types you have in mind.
This becomes your planning baseline. Every supplier conversation, every budget line, and every decision about what to prioritise should be measured against this single document. Couples who skip this step often find themselves three weeks in with a catering commitment for 200 guests at an event they later scale back to 80. Clarity at the start prevents expensive renegotiations later.
Days 90 to 75: Budget, Events, and Shortlists
Map your total available budget including any income you can responsibly allocate across the next three months. Assign a rough figure per event and keep a separate contingency buffer of at least 10 percent of the total. Do not distribute the contingency across events as padding. Keep it separate and unspent until you genuinely need it.
Build shortlists of three suppliers for each core category: venue, catering, photography, decor, and transport. Send the same enquiry message to each shortlist so you receive comparable quotes on the same terms. Keep all replies in a single notes file so you are comparing like for like when it comes to decision time.
- Venue brief: include your accessibility requirements, whether a prayer space or quiet room is needed, and your exact date window. Venues that cannot accommodate these needs are better identified at the shortlist stage than after a deposit is paid.
- Supplier outreach: ask for availability, outline pricing, and a clear list of what is included in setup and pack-down. Ambiguity on the last point frequently causes unexpected costs.
For multi-event South Asian weddings, assign separate budget lines for each event from day one rather than working from a single combined figure. A Mehndi, a Nikah, and a Walima each have different catering, decor, and venue needs. Treating them as one number makes it very easy to overspend on one event and discover the gap only when you reach the next.
Days 74 to 60: Book Core Services
Lock the venue first. Access times, parking arrangements, kitchen facilities, and layout constraints affect every other supplier decision. Once the venue is confirmed in writing, proceed to catering and photography. If your decor requires specialist installation or has long production lead times, secure that next.
Keep all communications in writing. When a supplier confirms verbally, follow up with a written message that summarises what was agreed and ask them to confirm. This creates a clear record and prevents the "I thought it included..." conversations that arise months later.
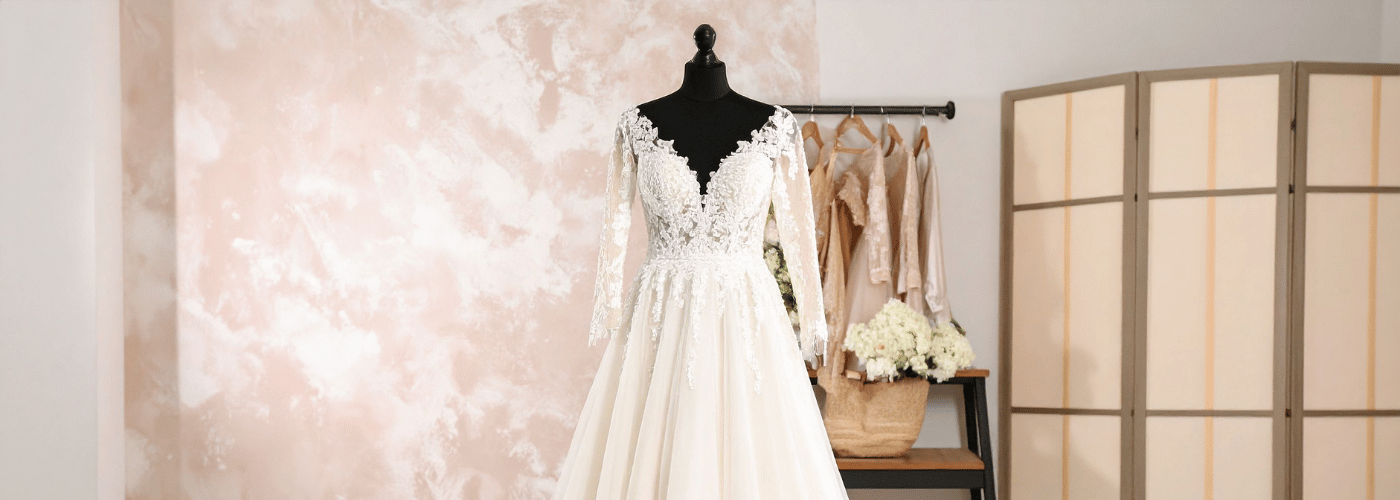
Order clothing that requires tailoring now. Bridalwear and cultural menswear, including sherwani, achkan, and any bespoke pieces, typically require two or three fittings across eight to twelve weeks. International orders need additional time for shipping and customs. Local ateliers frequently face queues during peak season. Ask each maker for a written schedule that shows the first fitting date, second fitting date, and final handover date, and check that the handover falls comfortably before your event, not the week of.
Days 59 to 45: Personalised Items and Guest Details
Anything with names, dates, or custom text needs proofing time before it goes to production. Approve designs for signage, favour packaging, guest gifts, and keepsakes. Lock spellings, colour choices, and font decisions in this window. A mistake found after production has started costs more to correct than the item itself in many cases.
Finalise the table card template now even if a small number of guest names are still pending. It is far easier to add names to a finished template than to redesign everything in the final two weeks when your attention is needed elsewhere. Share a first draft of the full guest list with your venue and caterer so they can begin planning table layout and service sequences.
Days 44 to 30: Fittings and Comfort Preparations
Attend your first or second clothing fitting wearing the exact shoes and underlayers you will wear on the day. Hems and fit adjusted without these items often need correcting at the final fitting, which adds both cost and stress. If footwear is being ordered for the couple or for members of the wedding party, order it now while there is still time for exchanges or adjustments.
Secure accessories that are likely to sell out: scarves, shawls, dupatta, hijabs, cufflinks, specific jewellery pieces, and hair accessories. For larger events, arrange the practical comfort details that make a significant difference to how guests experience the day: clear directional signage, drinking water available throughout longer ceremonies, additional seating near the ceremony space for elders and guests with mobility needs, and a clearly marked prayer area if required.
Days 29 to 21: Confirm All Logistics in Writing
Send a single consolidated message to every supplier that sets out the current plan in three parts: arrival and setup window, the event timeline, and pack-down and departure. Include access point instructions, parking details, and the direct contact number for your on-the-day coordinator or family lead. Ask each supplier to confirm they have received and understood the information.
If you need extended access time beyond what is included in your venue hire, agree the cost now and confirm it in writing. Trying to negotiate additional time on the morning of the event is rarely successful and always stressful. If the venue is part of a hotel or estate, confirm late checkout arrangements for any family rooms and collection windows for hired decor items.
Confirm who is responsible for waste removal and end-of-night cleaning at your venue. Many couples assume the venue handles this. Many venues assume the couple or caterer handles it. This mismatch, discovered at midnight on the night, is one of the most common sources of deposit disputes. Agree it explicitly, in writing, at least three weeks before the event.
Days 20 to 14: Final Numbers and the Run Sheet
Share your near-final guest count with the venue and caterer. Send dietary requirements in a clean, grouped list rather than a stream of individual notes. If you have a seating plan, share the table layout alongside it so the caterer can plan service routes efficiently.
Build your run sheet in this window. A run sheet is a single document that lists every moment of the day in time order: supplier arrivals, guest arrival, ceremony start, meal service, family photograph window, and departure. Build in buffer time between the ceremony and the meal, between the meal and any planned activities, and between the final event and the venue handover. Assign one named family lead per event who has the authority to make quick decisions when small issues arise, and share the run sheet with every supplier so everyone is working from the same document.
Days 13 to 7: Pack, Label, and Protect
Pack personalised items and small decor pieces into clearly labelled boxes with a simple note inside each one describing where the contents go. Put tools, fixings, and spare materials in clear zip bags with brief instructions. Prepare a day-of essentials kit containing sewing items, safety pins, double-sided tape, a stain remover pen, spare phone chargers, and any personal items you might need during the event.
Print copies of the run sheet and a short contact list with every supplier's name, role, and direct number. Confirm who holds the deposit receipts and balance confirmation messages for every booking, and store copies in one accessible place.
Days 6 to 2: Walkthrough and Handovers
If the schedule allows, visit the venue with your coordinator or a trusted friend and walk the full route a guest would take from the car park to their seat. This single walkthrough almost always surfaces at least one thing that needs attention: a sign that is needed, a door that needs to be propped, a pathway that is less clear than it looked on the floor plan.
Agree where the prayer space, family quiet rooms, and elder seating areas will be positioned. Put a printed floor plan in your setup box so anyone directing the setup on the morning has a reference without needing to call you. Hand over all signage, keepsake items, and decorative elements to the person responsible for the layout so you are not managing logistics on the morning of the event itself.
Day 1: The Day Itself
Start with a calm morning. Eat something simple before the preparation begins. Hand your phone to a sibling or close friend designated to handle vendor calls and last-minute logistics so you can stay present with family. Follow the run sheet, accept small changes with equanimity, and let the plan carry the structure of the day.
After the event, gather all hired items, personal belongings, and any boxes that need collecting in one designated spot so the pickup the following morning is straightforward. Take a moment before you leave to confirm with the venue that handover is complete so there are no questions about the deposit later.
Clothing and Personalised Items: The Non-Negotiable Lead Times
These two categories have hard lead times that cannot be compressed without accepting real risks. Clothing needs fitting appointments spaced across several weeks to allow adjustments to settle properly between sessions. Personalised items need proofing, production, and delivery time that disappears the moment you leave it too late.
- Clothing: book fittings at days 74 to 60 and keep breathing room between each appointment. Always attend in the correct shoes and underlayers.
- Personalised items: approve spellings and dates in writing at days 59 to 45. Request a digital proof showing scale and placement before production begins.
- Deliveries: set internal deadlines that land at least five days before your setup window. Items arriving on the morning of the event create pressure you do not need.
Weekly Recap
Weeks 1 to 2: Budget set, events listed, shortlists built, first supplier outreach sent. Weeks 3 to 4: Venue confirmed, catering and photography booked, clothing ordered with fitting schedule. Weeks 5 to 6: Personalised items approved in writing, guest list shared with venue and caterer. Weeks 7 to 8: Fittings with correct footwear, comfort items arranged, accessories secured. Week 9: All logistics confirmed in writing, access and parking documented. Week 10: Final numbers and run sheet built and distributed. Week 11: Pack, label, and protect. Week 12: Venue walkthrough, final handovers, calm start to the day.
Planning works best when each step is simple, specific, and sequenced correctly. Secure the items with real lead times first, keep all suppliers on the same page, and protect the final week for preparation rather than problem-solving. When the structure is right, the day looks after itself.