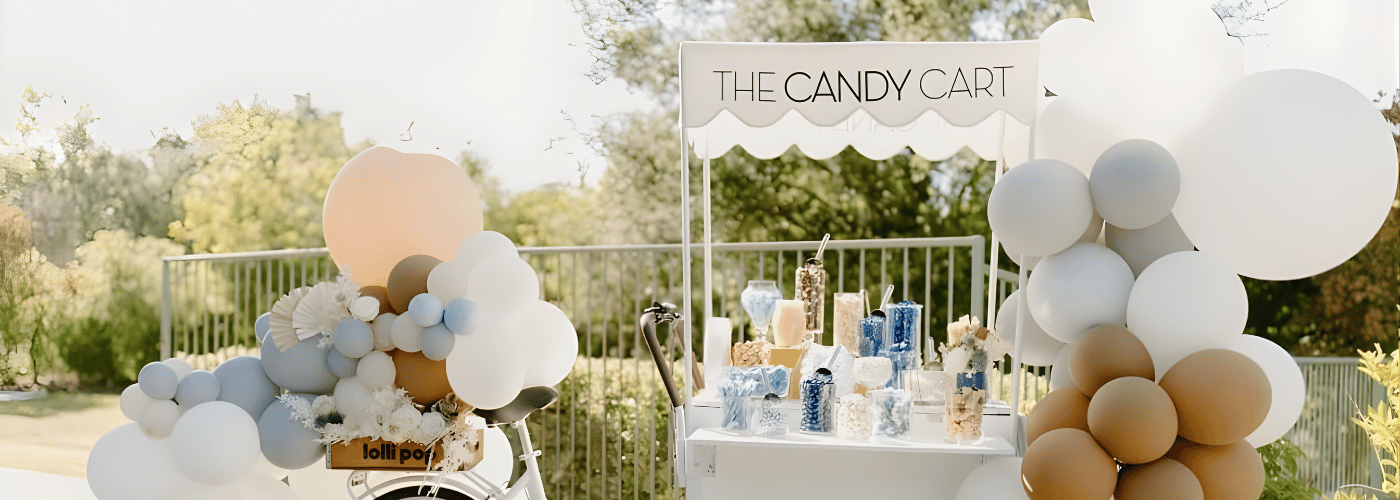
Wedding favours are a small gesture that leaves a meaningful impression. When done well they tie into the look of the event, show appreciation to guests, and offer something worth taking home. When done poorly they get left on the table at the end of the night. The difference between the two is almost always in the packaging and the personalisation, not the cost of the filling. With the right approach, DIY favours can look genuinely bespoke while remaining comfortably within budget. This guide covers every practical decision, from packaging to filling to finishing touches, with a simple timeline so nothing is rushed in the weeks before your events.
Start With the Packaging: Boxes or Bags
The packaging decision shapes everything else: the filling size, the sticker or tag type, the ribbon style, and how the finished favour looks on the table. Most DIY wedding favours fall into one of two categories and both can look beautiful with the right finishing.
Favour Boxes
Boxes feel structured and elegant. They sit well on tables, stack easily for transport, and hold their shape regardless of what is inside them. Two main styles work well for personalised DIY favours.
- Visible boxes with clear acrylic panels or windowed lids let guests see the contents before opening. These work particularly well for colourful fillings such as sweets, dried fruit, or small treats where the visual appeal is part of the presentation.
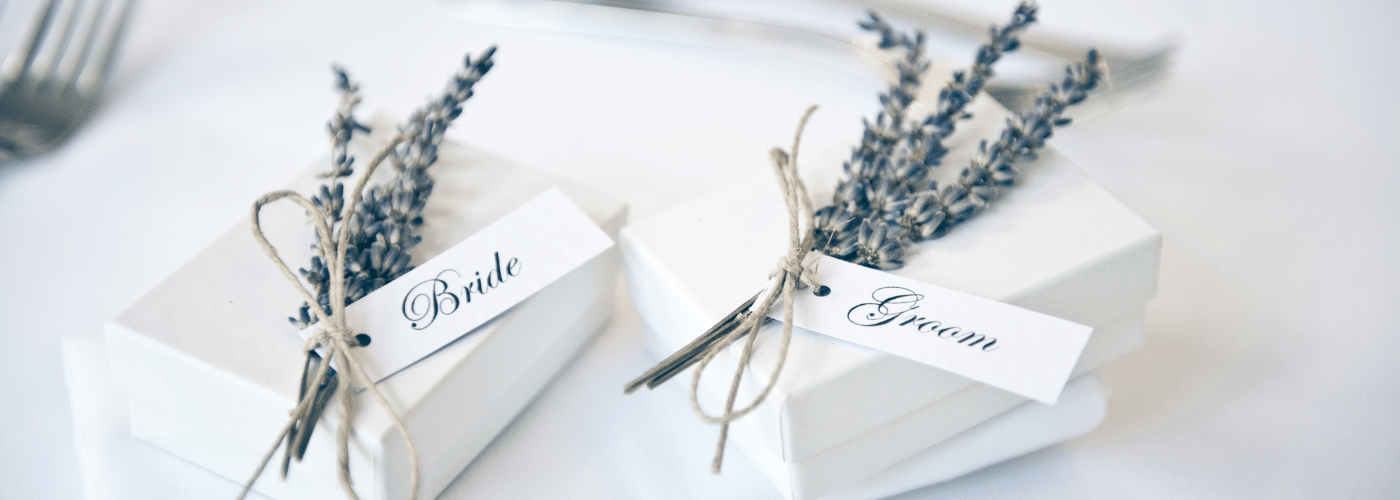
- Hidden boxes in sturdy cardboard or matte-finish designs keep the contents as a surprise and create a more formal, luxury feel. The outside of the box carries all the personalisation, so the quality of the sticker or tag matters more here than with visible packaging.
Buy boxes in bulk once you have confirmed your guest count across all events. Having a small excess is worth the cost. Running out during a family packing session because of a few damaged boxes is a frustrating and avoidable situation.
Favour Bags
Bags are the most practical and affordable option, particularly for large guest counts. They are lighter, easier to pack and transport, and forgiving when contents vary slightly in size or quantity.
- Visible fabric bags such as organza or sheer cellophane let the filling show through and create a light, delicate look. These pair well with a ribbon tie and a small custom sticker or hang tag on the outside.
- Luxury fabric bags in velvet, linen, or satin feel more premium and suit formal reception events. Stickers do not adhere well to textured surfaces, so use printed card tags tied with ribbon or thin cord rather than adhesive labels.
Before ordering your full quantity, buy five to ten boxes or bags and assemble one complete favour. Check that the filling fits, the ribbon ties at the right length, and the sticker or tag looks as expected. Small issues discovered at this stage are easy to fix. The same issues discovered after ordering 200 units are not.
Personalisation: Stickers, Tags, and Ribbon
Personalisation is what separates a DIY favour from a generic one. Three elements do the most work and all of them are straightforward to produce at home or through an inexpensive online supplier.
- Round or square stickers with the couple's names, the event date, or a short phrase are the simplest and most cost-effective personalisation option. They work on smooth surfaces including cardboard boxes, clear bags, and cellophane. Design them in Canva or a similar free tool and order through any online print supplier.
- Printed hang tags on card tied with ribbon or thin twine work on any packaging surface, including textured fabric bags where stickers will not adhere. They also allow more text than a small sticker, which is useful if you want to include a short message or prayer.
- Ribbon in your event colour adds the finishing touch that ties each favour into the broader look of the table. A simple bow or a neat knot is all that is needed. Consistency across every favour matters more than complexity.
What to Fill Them With
The filling should suit your guest profile and your event type. A Mehndi and a formal Walima reception can have the same packaging with slightly different fillings to make each event feel distinct without reworking the whole favour setup.
- Dates and dried fruits: a meaningful and universally appreciated choice for Muslim weddings. A small mix of Medjool dates, dried apricots, or figs in a clear bag or box looks elegant and connects the favour to the tradition of the day.
- Wrapped halal chocolates or sweets: one of the most reliably well-received options across all guest ages. Confirm packaging is halal-certified when ordering in bulk for large guest counts.
- Baklava or traditional sweets: particularly suited to South Asian and Middle Eastern wedding events. Small individually wrapped pieces in a clear box or fabric bag feel generous without being impractical to transport.
- Mini macarons or premium biscuits: work well for a minimalist, pastel-themed event where the visual presentation of the filling matters. Use a clear box so the colours are visible.
- Fragrant items such as small candles or soap: non-edible favours that guests are more likely to keep and use at home. These suit receptions where a more lifestyle-oriented gift feels appropriate.
If you are hosting multiple events, consider varying the filling for each celebration. The same packaging with different contents is an easy way to make each day feel considered without significantly increasing your workload or budget.
If your guest list includes people with nut allergies, dairy intolerances, or other dietary requirements, make sure your filling choice is clearly labelled or that an alternative is available. A small note at the favour station explaining the contents is a simple and considerate addition.
When to Order Materials and Prepare
Favour preparation left to the final two weeks becomes a source of stress in an already busy period. A simple timeline prevents this.
- 8 weeks before your first event: decide on packaging style, filling, and personalisation approach. Place a small test order of boxes or bags to check sizing and quality.
- 6 weeks before: confirm final guest counts and order your full quantity of packaging. Order stickers or hang tags at the same time so everything arrives together.
- 4 weeks before: order your filling in the confirmed quantity. Factor in a small excess to account for breakage, overflow, and any last-minute additions to the guest list.
- 2 to 3 weeks before: hold your main assembly session with family. This is when everything gets filled, tied, and packed. Completing this at least two weeks before the first event means any issues, a sticker that does not sit right, a ribbon that runs out, a filling that arrives short, can be fixed without pressure.
Making the Assembly Session Enjoyable
A favour assembly session with family members is one of the nicer practical tasks in the wedding planning process when it is organised well. A few simple things make it run smoothly.
- Set up a production line with each person responsible for one stage: filling, closing, tying, and stickering. This is significantly faster than each person completing individual favours from start to finish.
- Have all materials in one place before you start. Searching for a second spool of ribbon halfway through the session breaks the flow and wastes time.
- Count as you go. Keep a running total so you know exactly where you are against your target count. Running out of a material at 180 when you needed 200 is much easier to fix a week before the wedding than the night before.
Final Thoughts
Personalised wedding favours do not need a large budget or specialist skills. They need good packaging, a thoughtful filling, consistent personalisation, and enough time to make them properly. When those four things are in place, the result looks considered and carefully made, which is exactly the impression a well-chosen favour should leave.
For step-by-step tutorials, material suggestions, and design inspiration across all favour styles, visit the DIY Wedding Favours section on Wedsi.